Weather Station : Adding Outdoor Temperature

This is the second article in the "Weather Station Project" series. If you want to know more, please check the previous article, in which I explained how built the device. It has been running since then, and I'm satisfied with the result.
The first version only displayed indoor temperature. I wanted to improve it by adding outdoor temperature too. Using an external sensor is not very practical because of the long wires, limiting the station mobility. The idea is that we use a thermometer for the indoor temperature, and a weather online service for outdoor.
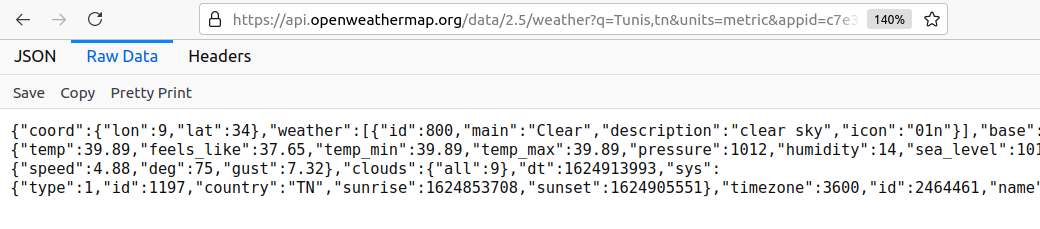
The weather API that we will be using is "openweathermap.org". It's free if we don't exceed 60 calls per minute, which is more than enough for our project. You can check the API documentation on their website: https://openweathermap.org/api.
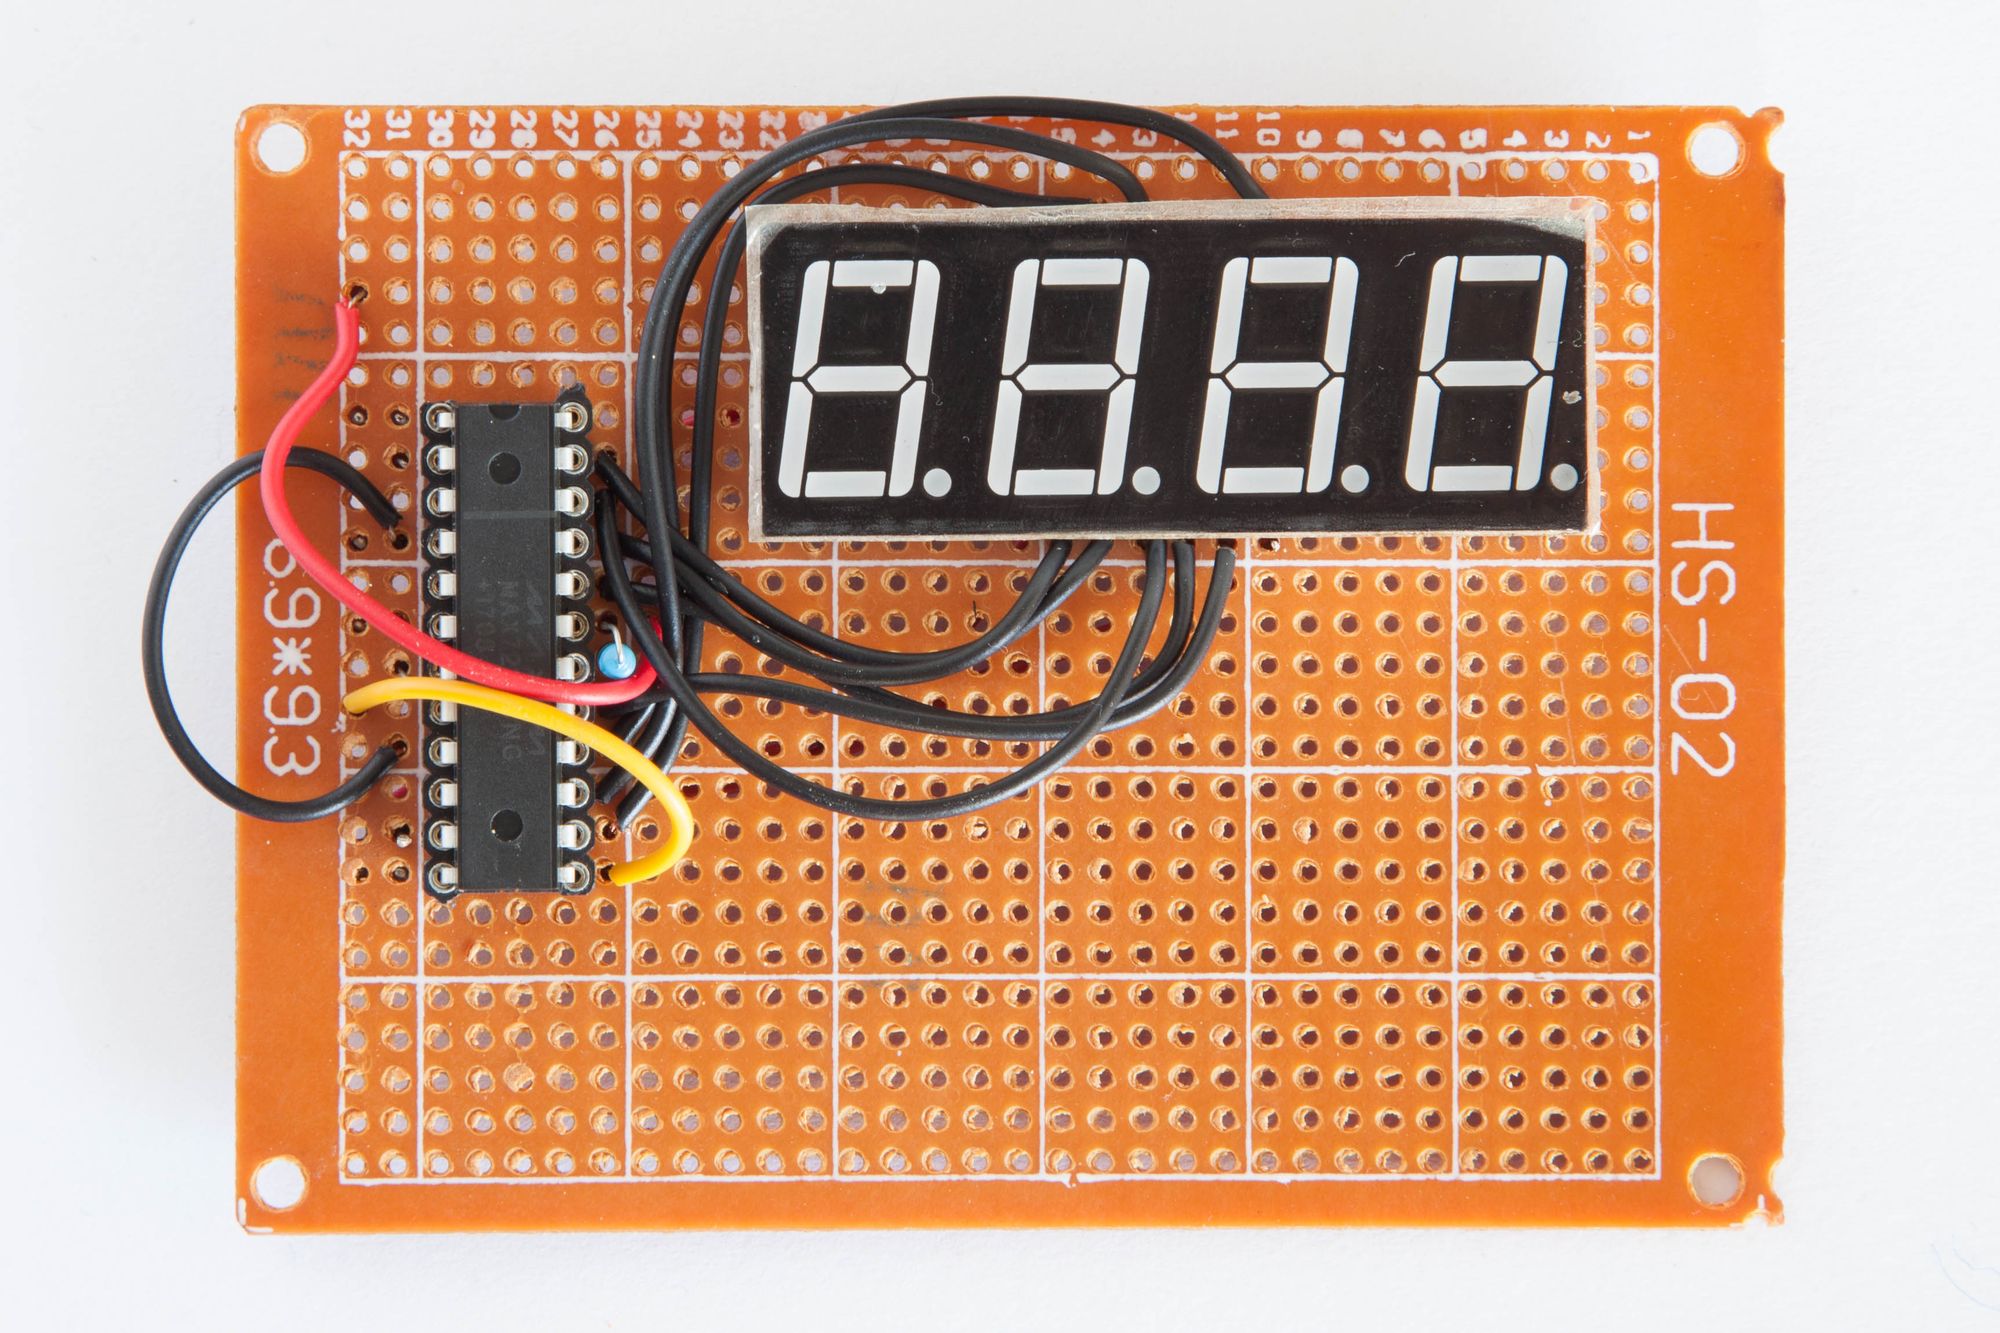
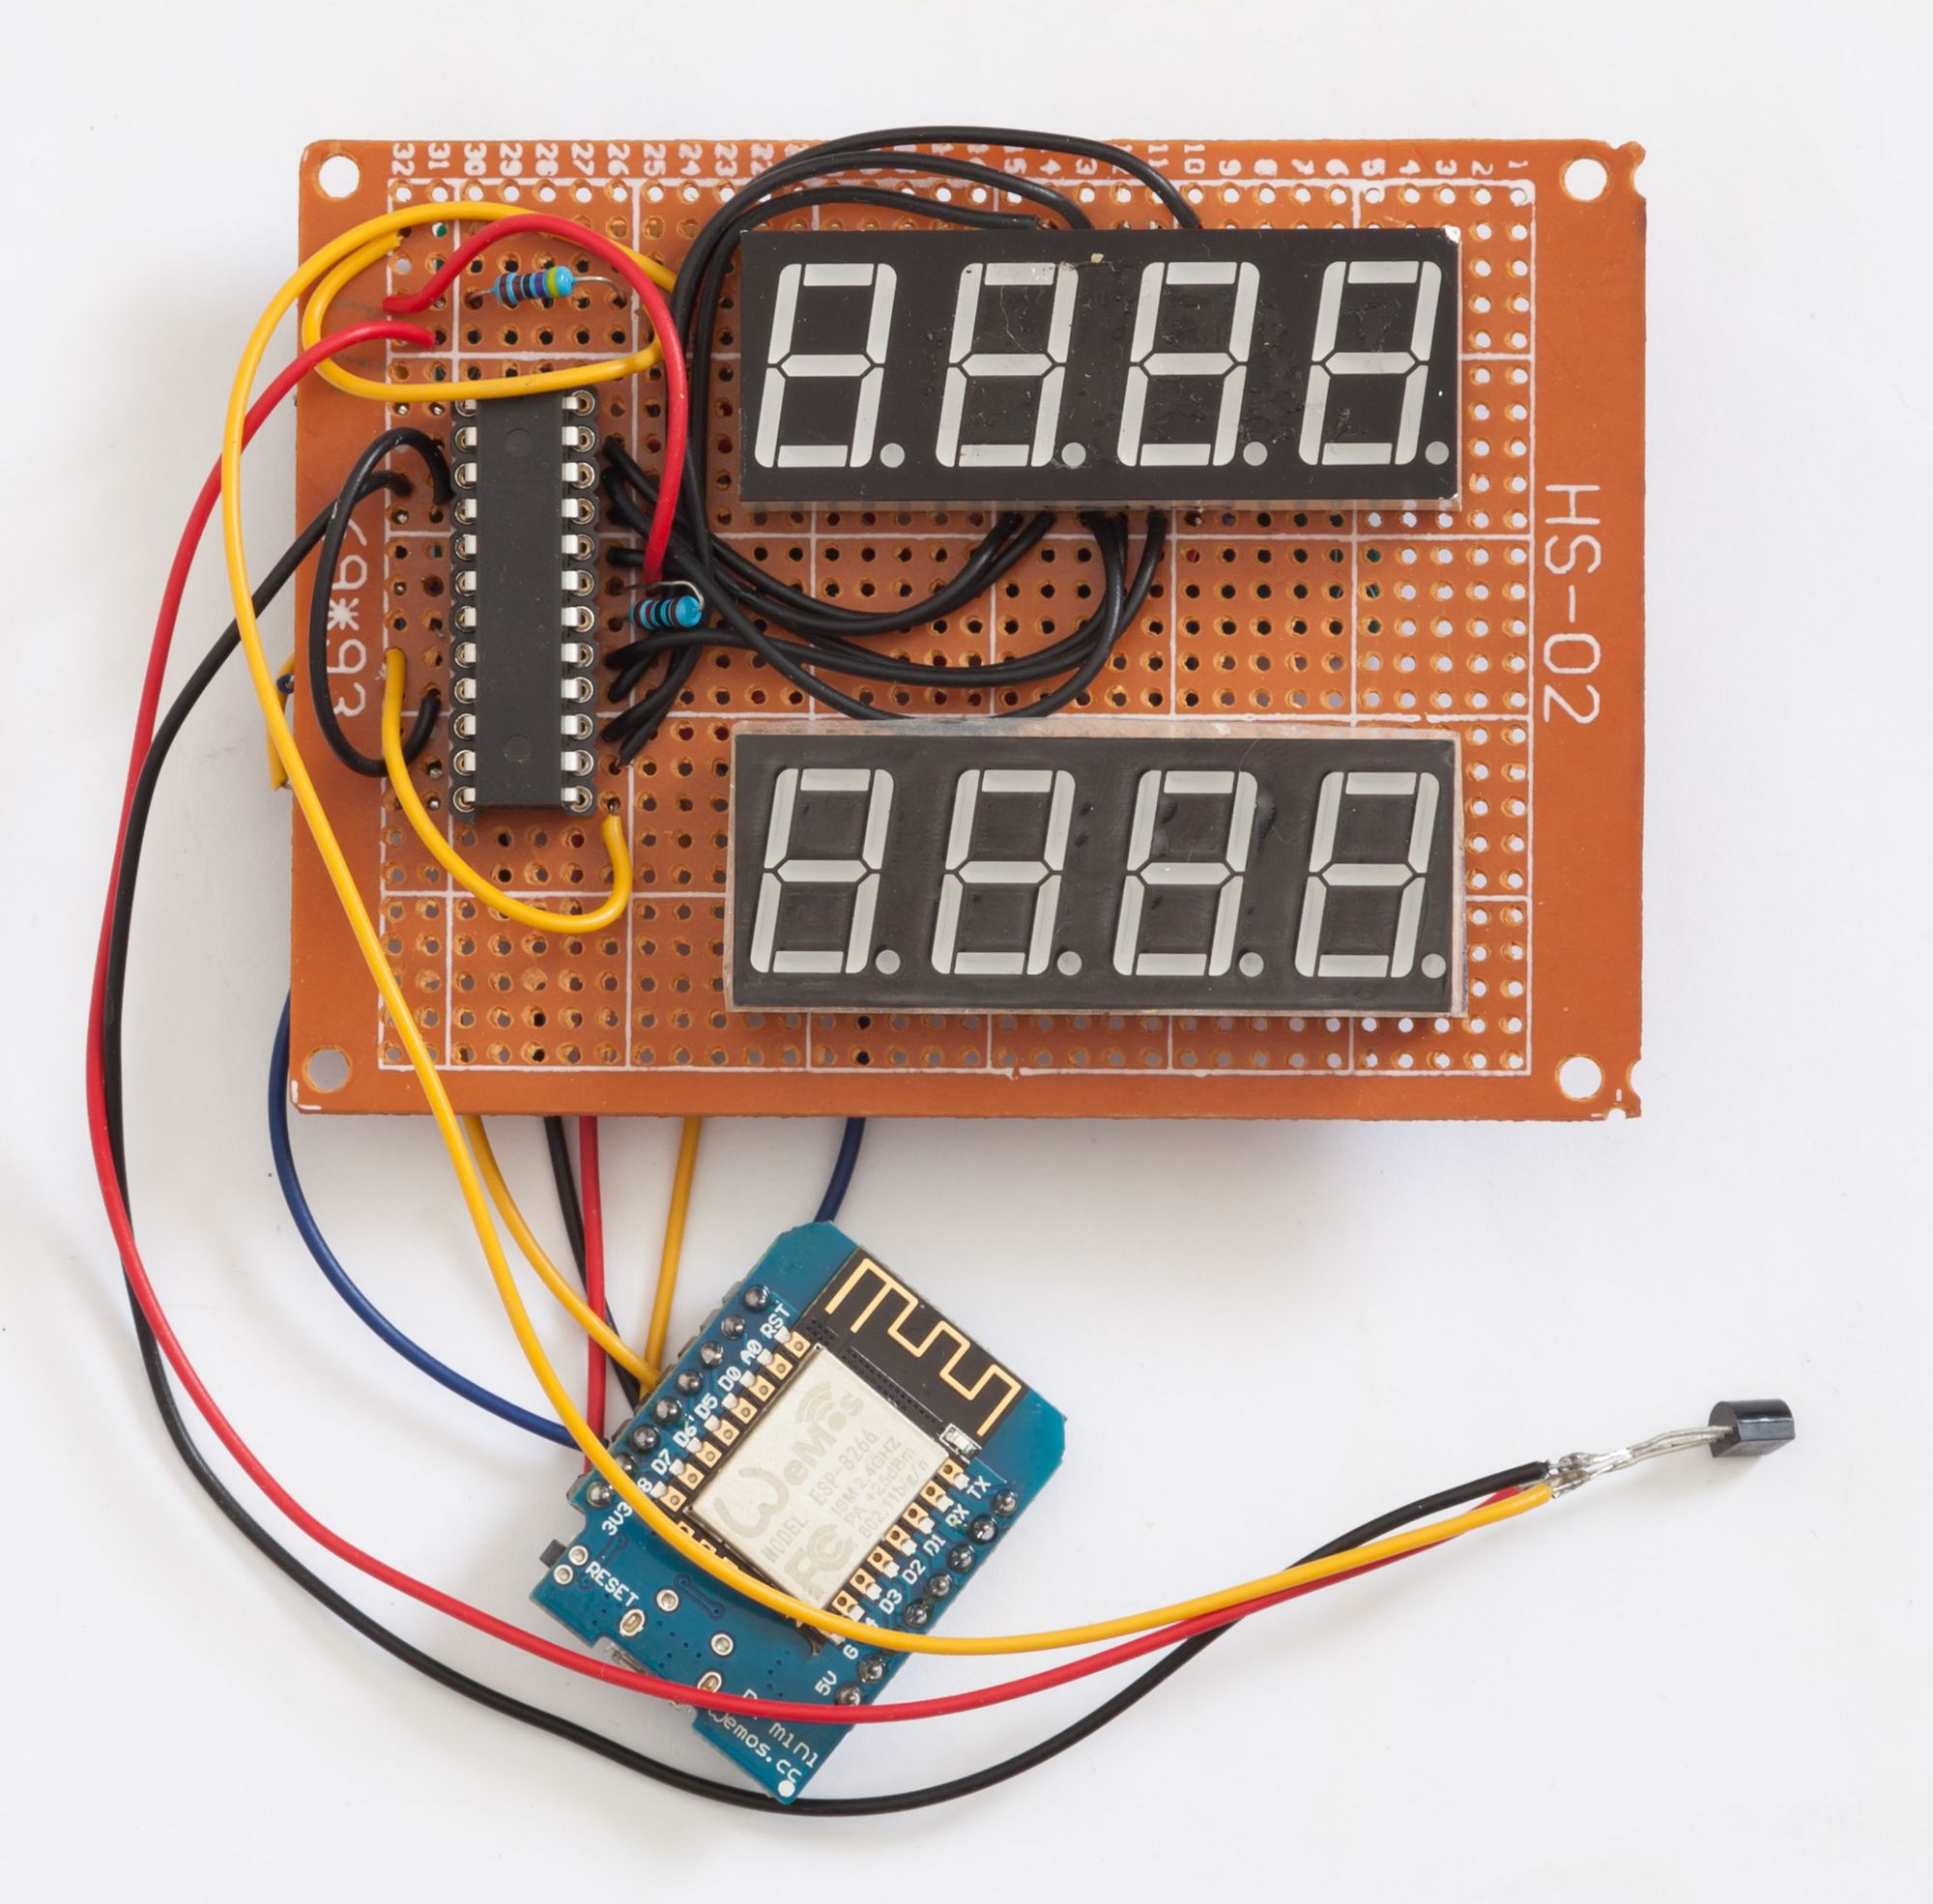
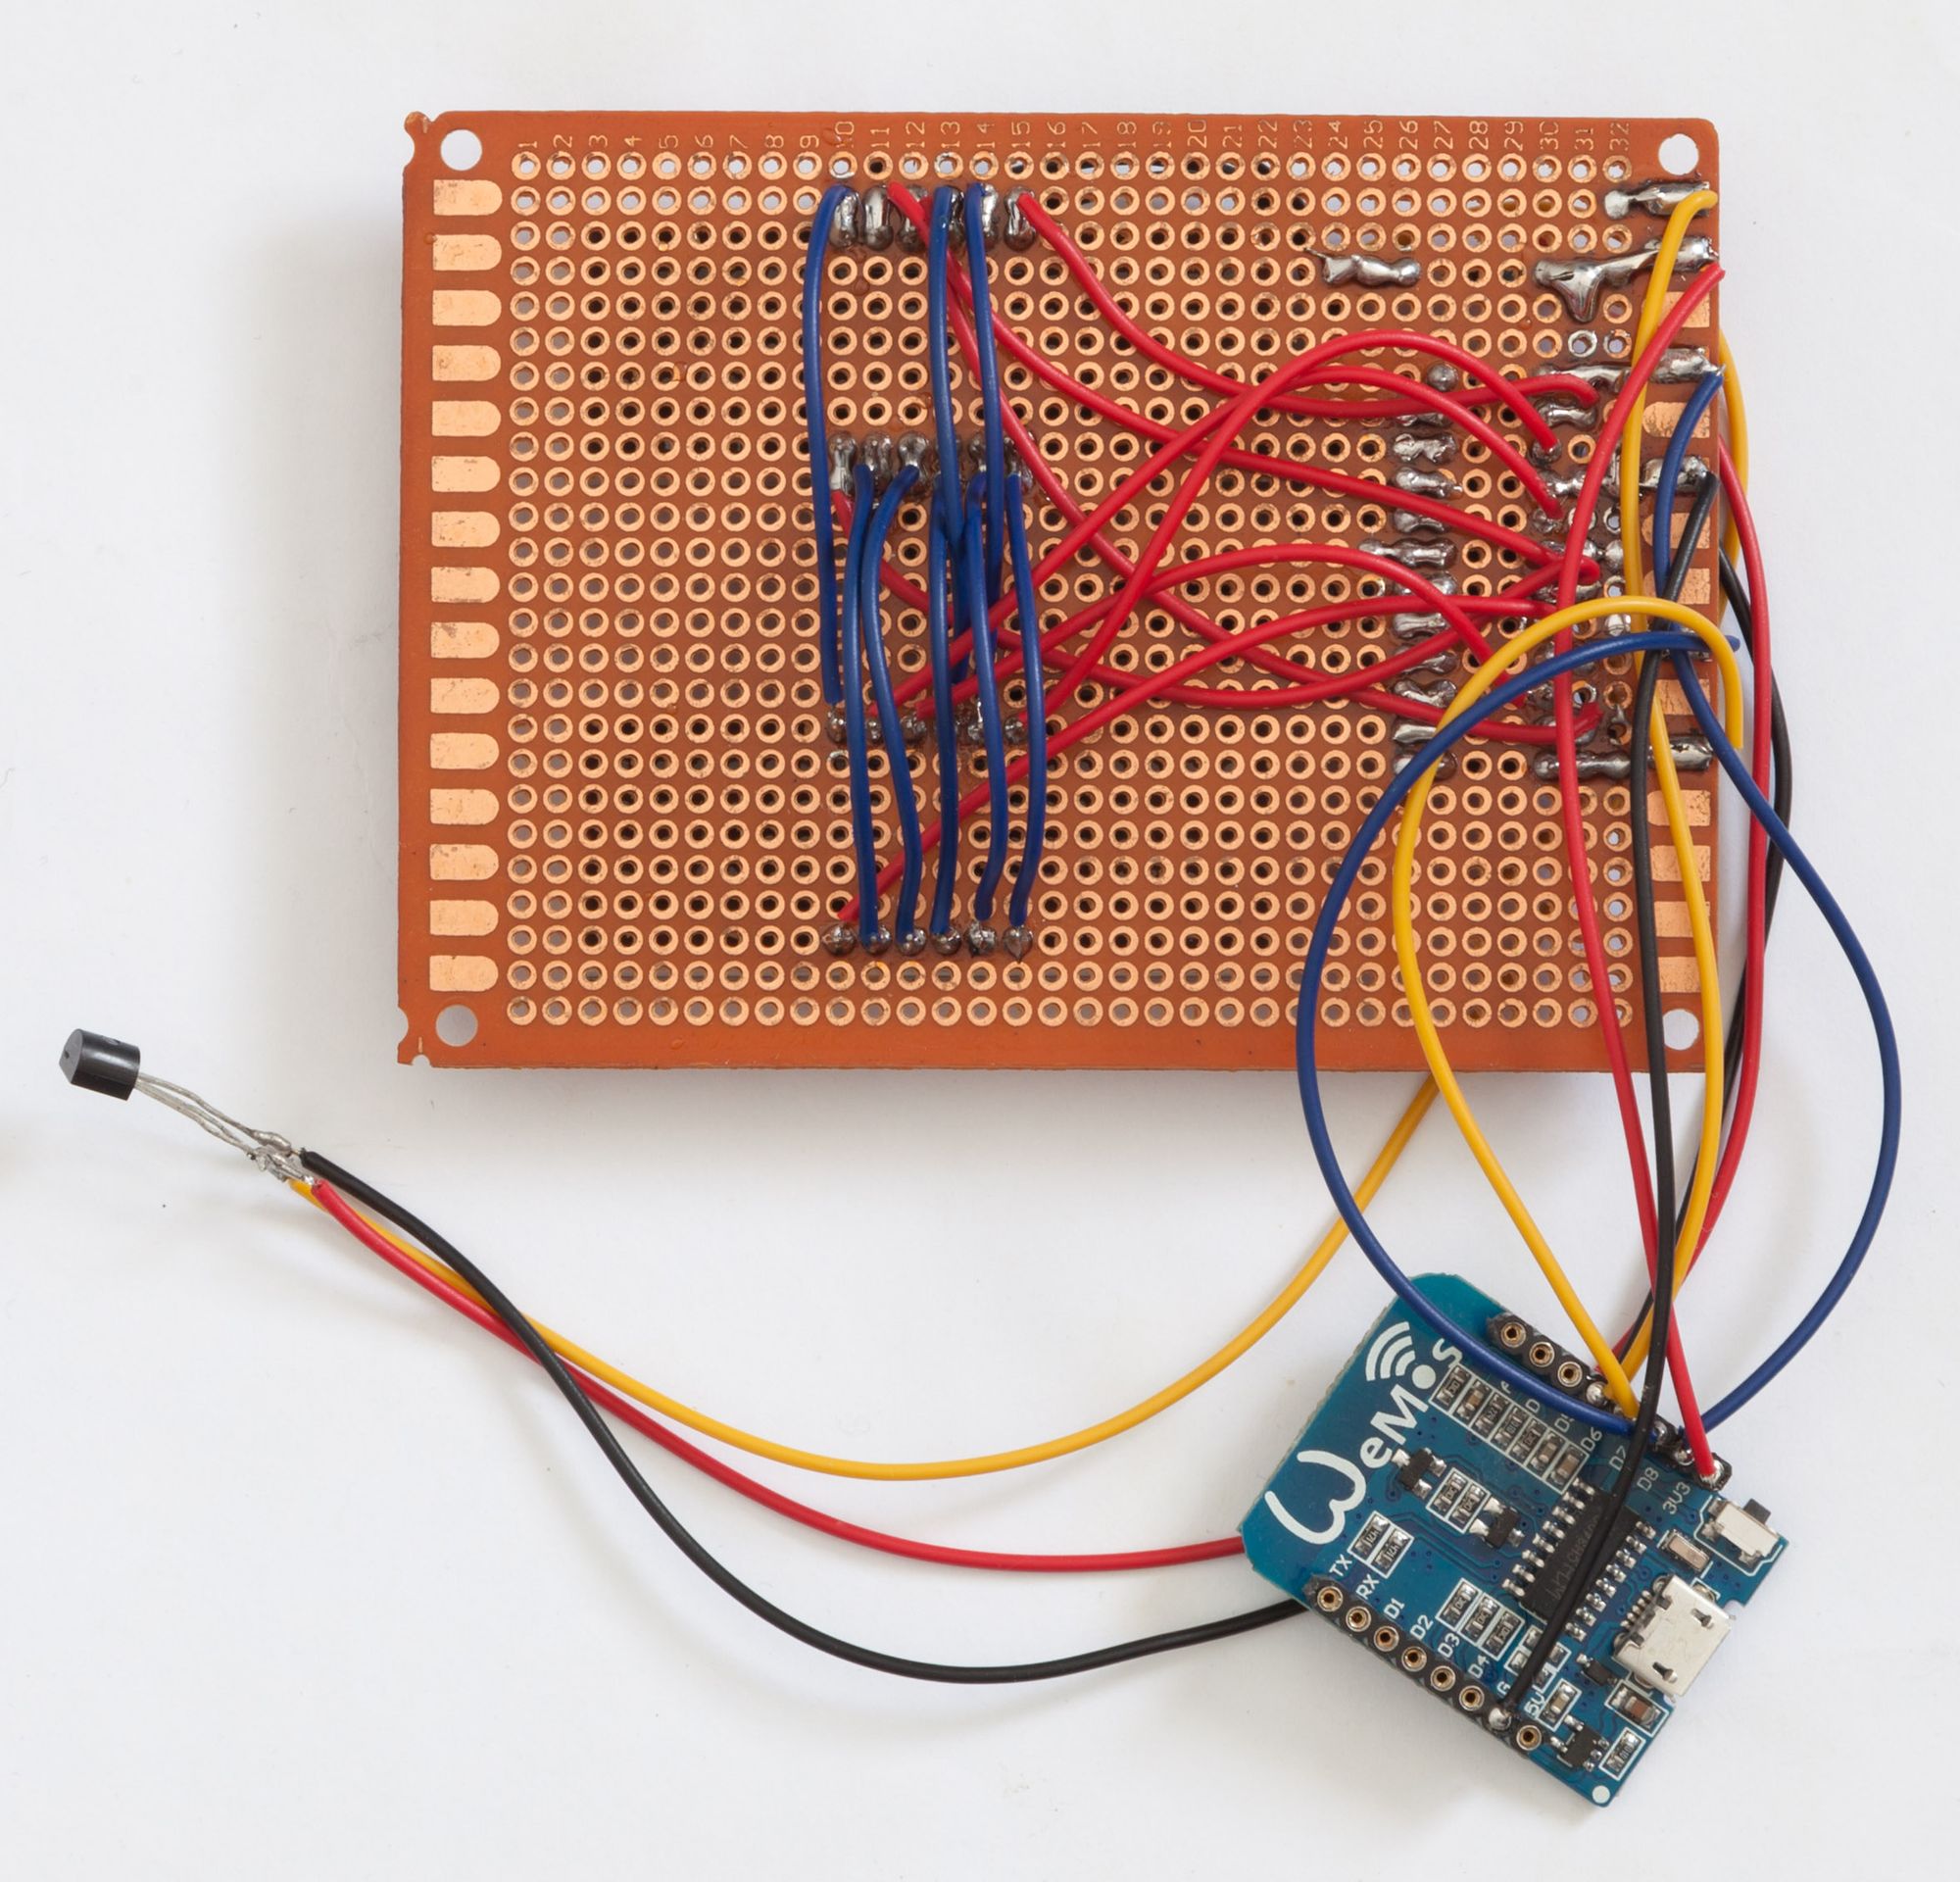
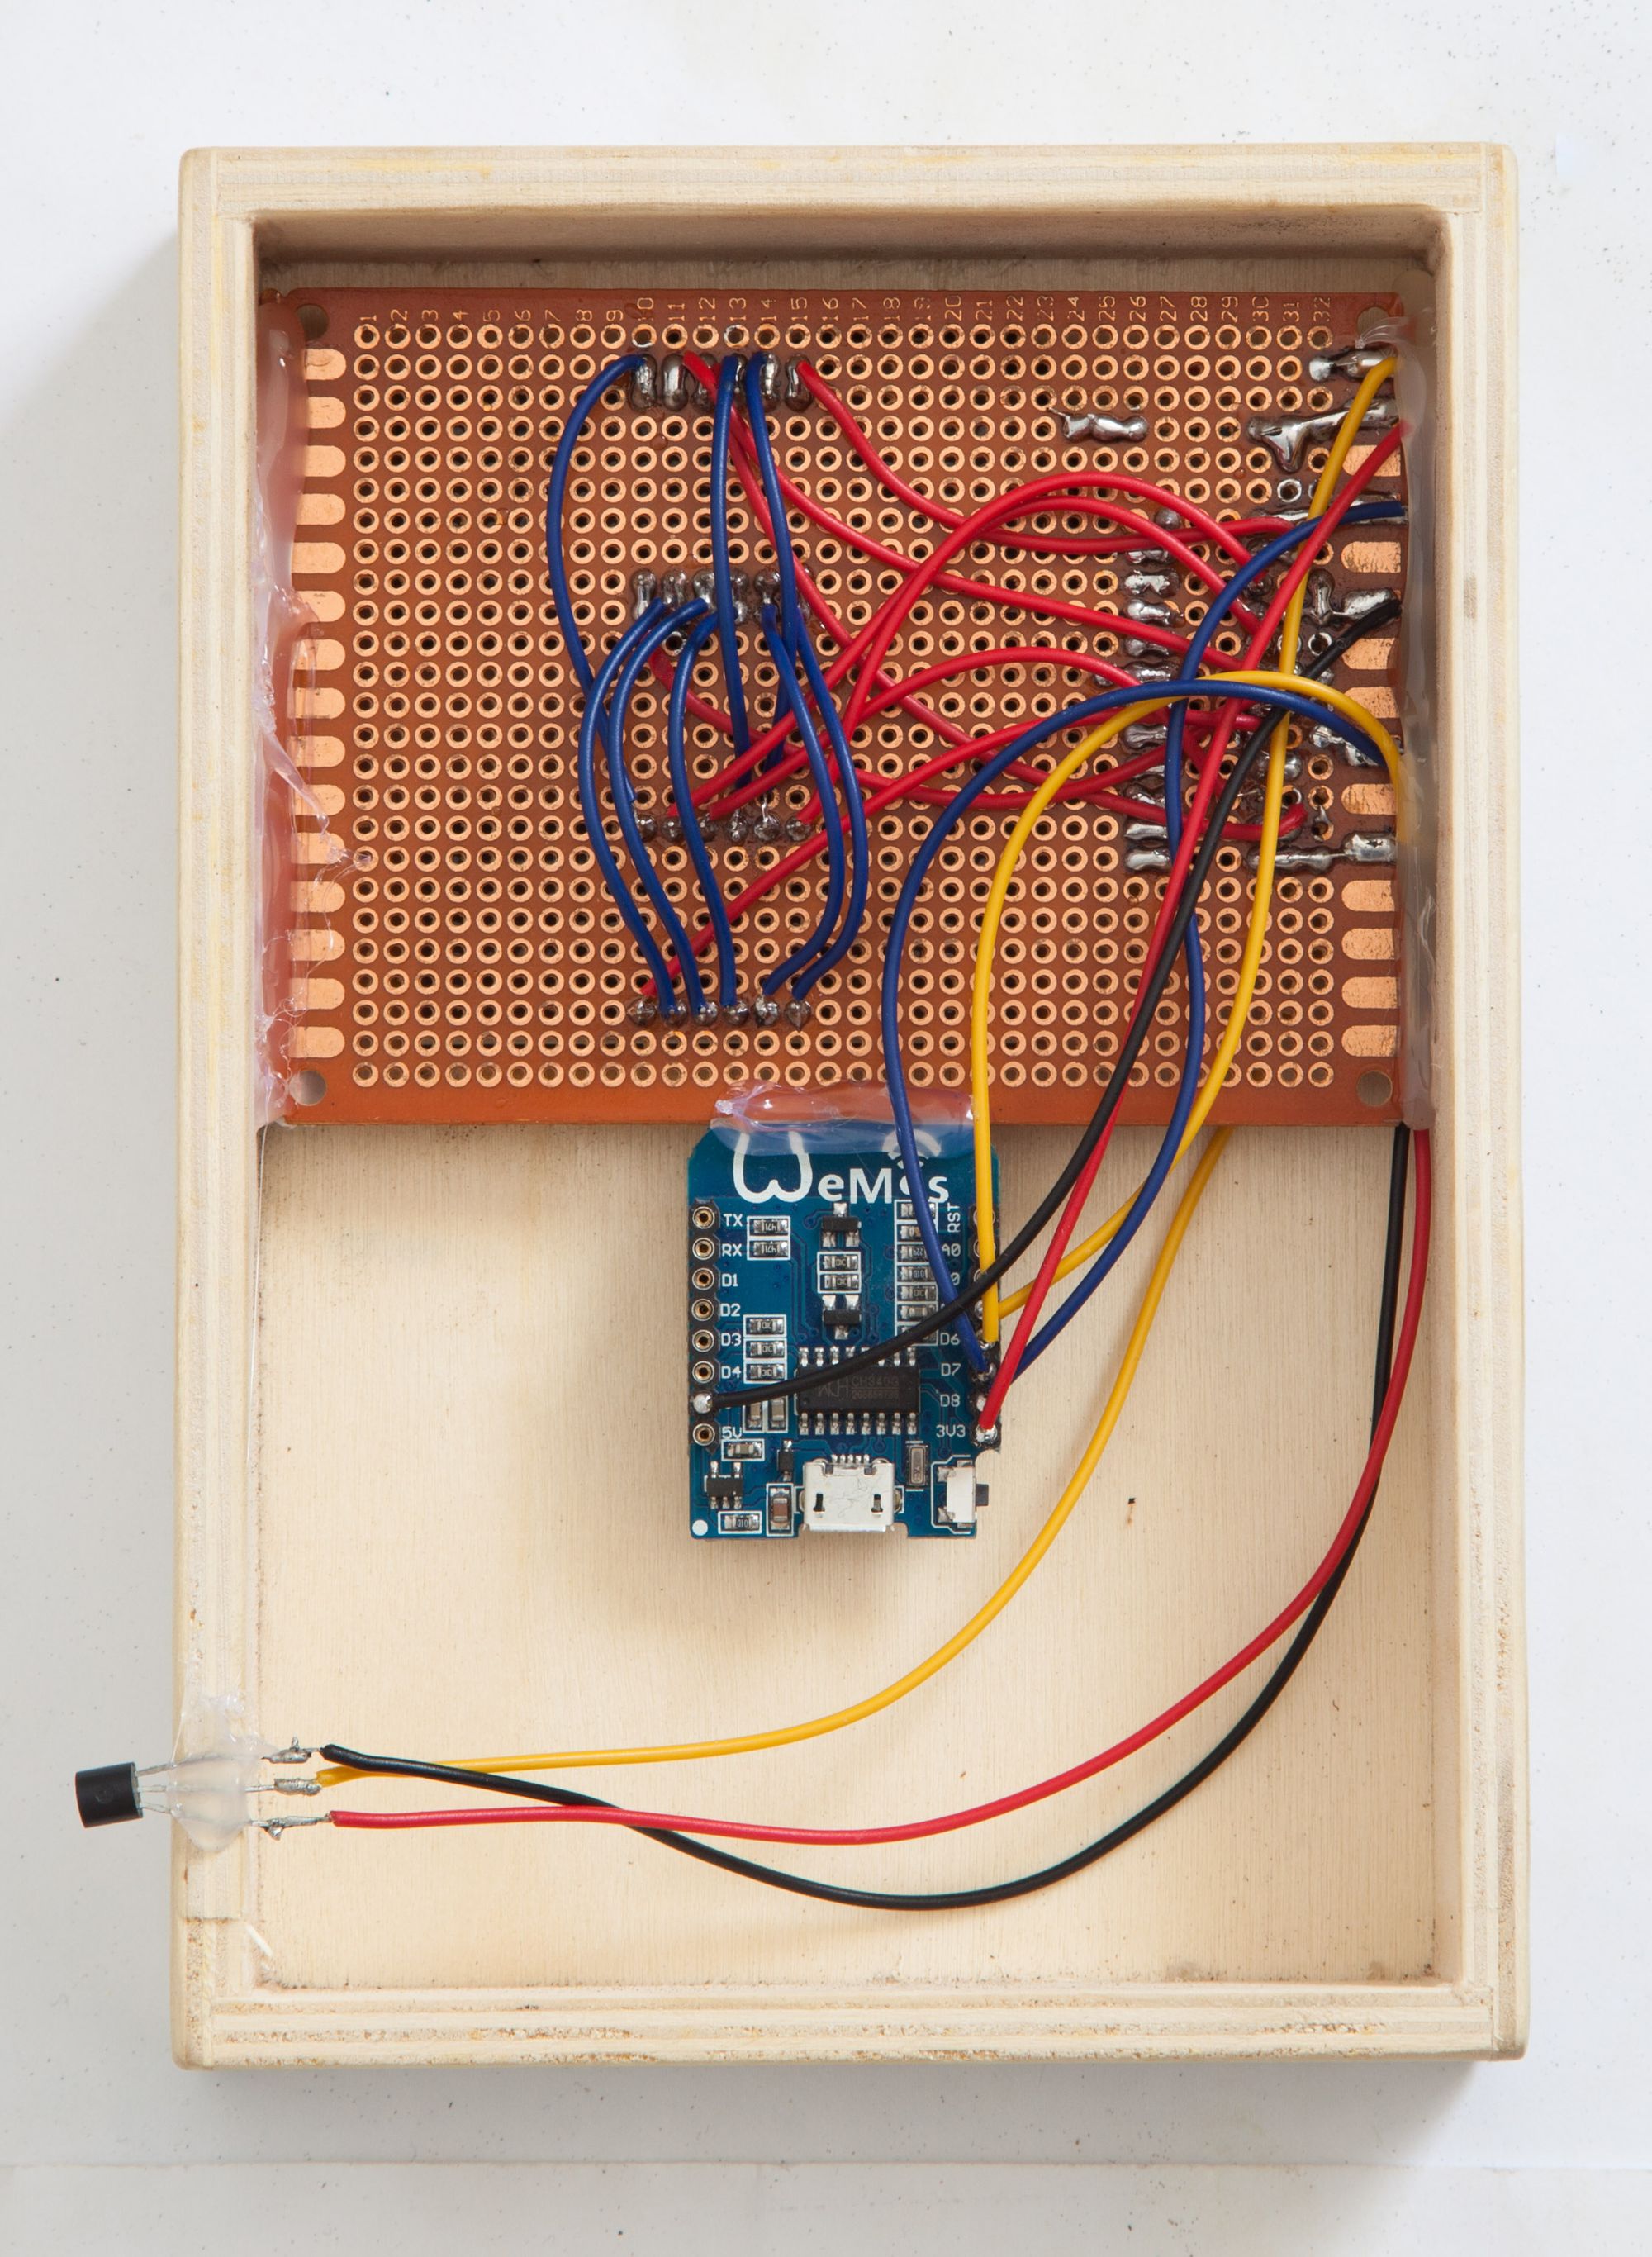
Next, I added a second 4 digits, 7 segments LED display, identical to the first one. Because our LED driver (MAX7221) can handle up to 8 digits, I will use it to run both displays.
Here is the PCB with the second display in place.
#include <OneWire.h>
#include <DallasTemperature.h>
#include <LedControl.h>
#include <ESP8266WiFi.h>
#include <WiFiClientSecure.h>
#include <ArduinoJson.h>
// start oneWire connection on Pin D5
OneWire oneWire(D5);
// Pin D8 <==> DIN
// Pin D6 <==> LOAD
// Pin D7 <==> CLK
LedControl lc = LedControl(D8, D7, D6, 1);
// put your wifi parameters here
const char* ssid = "XXXXXXXX";
const char* password = "XXXXXXXX";
const char* host = "api.openweathermap.org";
const int httpsPort = 443;
// Use web browser to view and copy
// SHA1 fingerprint of the SSL certificate
const char* fingerprint = "EE AA 58 6D 4F 1F 42 F4 18 5B 7F B0 F2 0A 4C DD 97 47 7D 99";
// openweathermap API key
const char* apiKey = "xxxxxxxxxxxxxxxxxxxxxxxxxxxxxxxx";
int skipLoop = 0;
DallasTemperature DS18B20(&oneWire);
char temperatureInteriorCString[7];
char temperatureExteriorCString[7];
// reads temperature and returns a string. Example: 24.9 or -12.2
void getInteriorTemperature() {
float tempC;
do {
DS18B20.requestTemperatures();
tempC = DS18B20.getTempCByIndex(0);
dtostrf(tempC, 4, 1, temperatureInteriorCString);
delay(100);
} while (tempC == 85.0 || tempC == (-127.0));
}
void getExteriorTemperature() {
Serial.begin(115200);
Serial.println();
Serial.print("connecting to ");
Serial.println(ssid);
WiFi.mode(WIFI_STA);
WiFi.begin(ssid, password);
while (WiFi.status() != WL_CONNECTED) {
delay(500);
Serial.print(".");
}
Serial.println("");
Serial.println("WiFi connected");
Serial.println("IP address: ");
Serial.println(WiFi.localIP());
delay(500);
// Use WiFiClientSecure class to create TLS connection
WiFiClientSecure client;
Serial.print("connecting to ");
Serial.println(host);
if (!client.connect(host, httpsPort)) {
Serial.println("connection failed");
return;
}
if (client.verify(fingerprint, host)) {
Serial.println("certificate matches");
} else {
Serial.println("certificate doesn't match");
}
String url = "/data/2.5/weather?q=Tunis,tn&units=metric&appid=" + apiKey;
Serial.print("requesting URL: ");
Serial.println(url);
client.print(String("GET ") + url + " HTTP/1.1\r\n" +
"Host: " + host + "\r\n" +
"User-Agent: MeteoTunisESP8266\r\n" +
"Connection: close\r\n\r\n");
Serial.println("request sent");
while (client.connected()) {
String line = client.readStringUntil('\n');
if (line == "\r") {
Serial.println("headers received");
break;
}
}
String line = client.readStringUntil('\n');
if (line.startsWith("{\"coord\":")) {
Serial.println("Meteo successfull!");
} else {
Serial.println("Meteo has failed");
}
Serial.println("reply was:");
Serial.println("==========");
Serial.println(line);
Serial.println("==========");
Serial.println("closing connection");
StaticJsonBuffer<1000> jsonBuffer;
JsonObject& root = jsonBuffer.parseObject(line);
if (!root.success()) {
Serial.println("parseObject() failed");
return;
}
float tempC = root["main"]["temp"];
dtostrf(tempC, 4, 1, temperatureExteriorCString);
}
// only runs once on boot
void setup() {
// Initializing serial port for debugging purposes
Serial.begin(115200);
delay(10);
DS18B20.begin();
// Initialize the MAX7219 device
lc.shutdown(0,false); // Enable display
lc.setIntensity(0,10); // Set brightness level (0 is min, 15 is max)
lc.clearDisplay(0); // Clear display register
}
// runs over and over again
void loop() {
getInteriorTemperature();
skipLoop--;
if (skipLoop <0) {
getExteriorTemperature();
skipLoop = 5;
}
Serial.println(temperatureInteriorCString);
Serial.println(temperatureExteriorCString);
// refresh LED Display
lc.clearDisplay(0);
if (temperatureInteriorCString[0] == '-') {
// Format: -XX.X
lc.setDigit(0,0, '-', false);
lc.setDigit(0,1, temperatureInteriorCString[1] - '0', false);
lc.setDigit(0,2, temperatureInteriorCString[2] - '0', true);
lc.setDigit(0,3, temperatureInteriorCString[4] - '0', false);
} else {
// format: XX.X
lc.setDigit(0,0, '0', false);
lc.setDigit(0,1, temperatureInteriorCString[0] - '0', false);
lc.setDigit(0,2, temperatureInteriorCString[1] - '0', true);
lc.setDigit(0,3, temperatureInteriorCString[3] - '0', false);
}
if (temperatureExteriorCString[0] == '-') {
// Format: -XX.X
lc.setDigit(0,4, '-', false);
lc.setDigit(0,5, temperatureExteriorCString[1] - '0', false);
lc.setDigit(0,6, temperatureExteriorCString[2] - '0', true);
lc.setDigit(0,7, temperatureExteriorCString[4] - '0', false);
} else {
// format: XX.X
lc.setDigit(0,4, '0', false);
lc.setDigit(0,5, temperatureExteriorCString[0] - '0', false);
lc.setDigit(0,6, temperatureExteriorCString[1] - '0', true);
lc.setDigit(0,7, temperatureExteriorCString[3] - '0', false);
}
// wait at least 10 seconds to avoid DS18B20 self-heating (incorrect readings)
delay(10000);
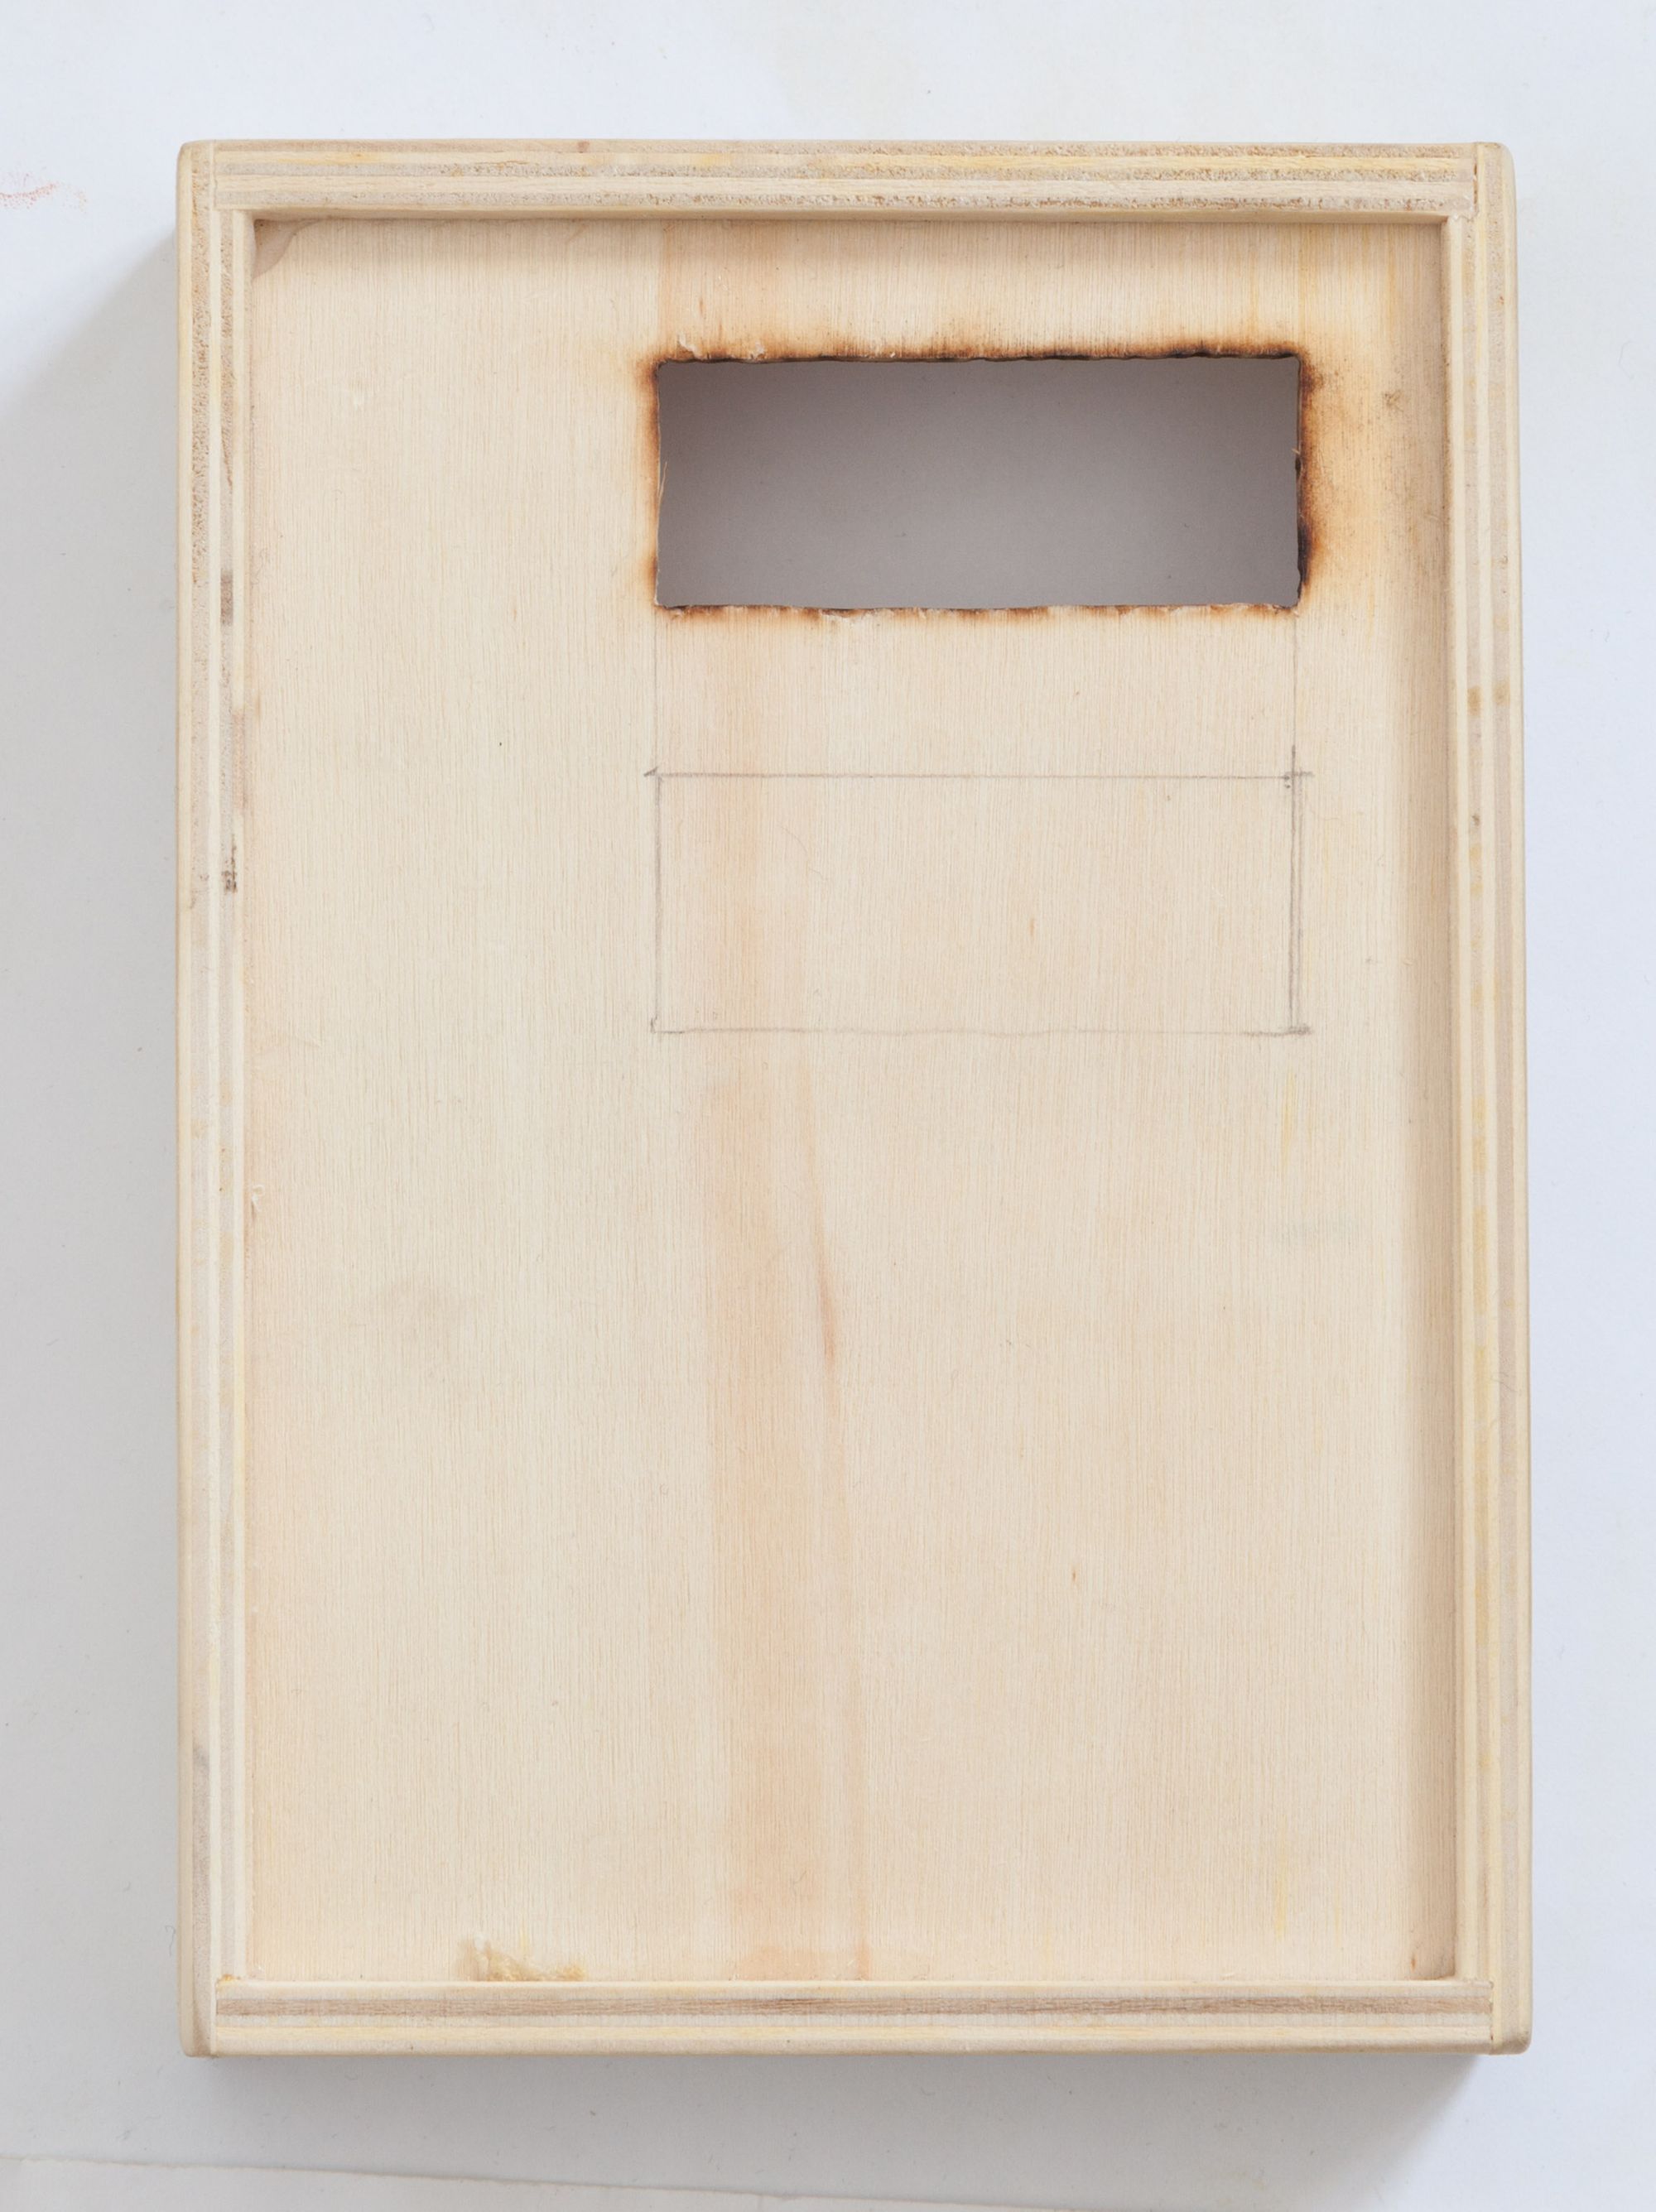
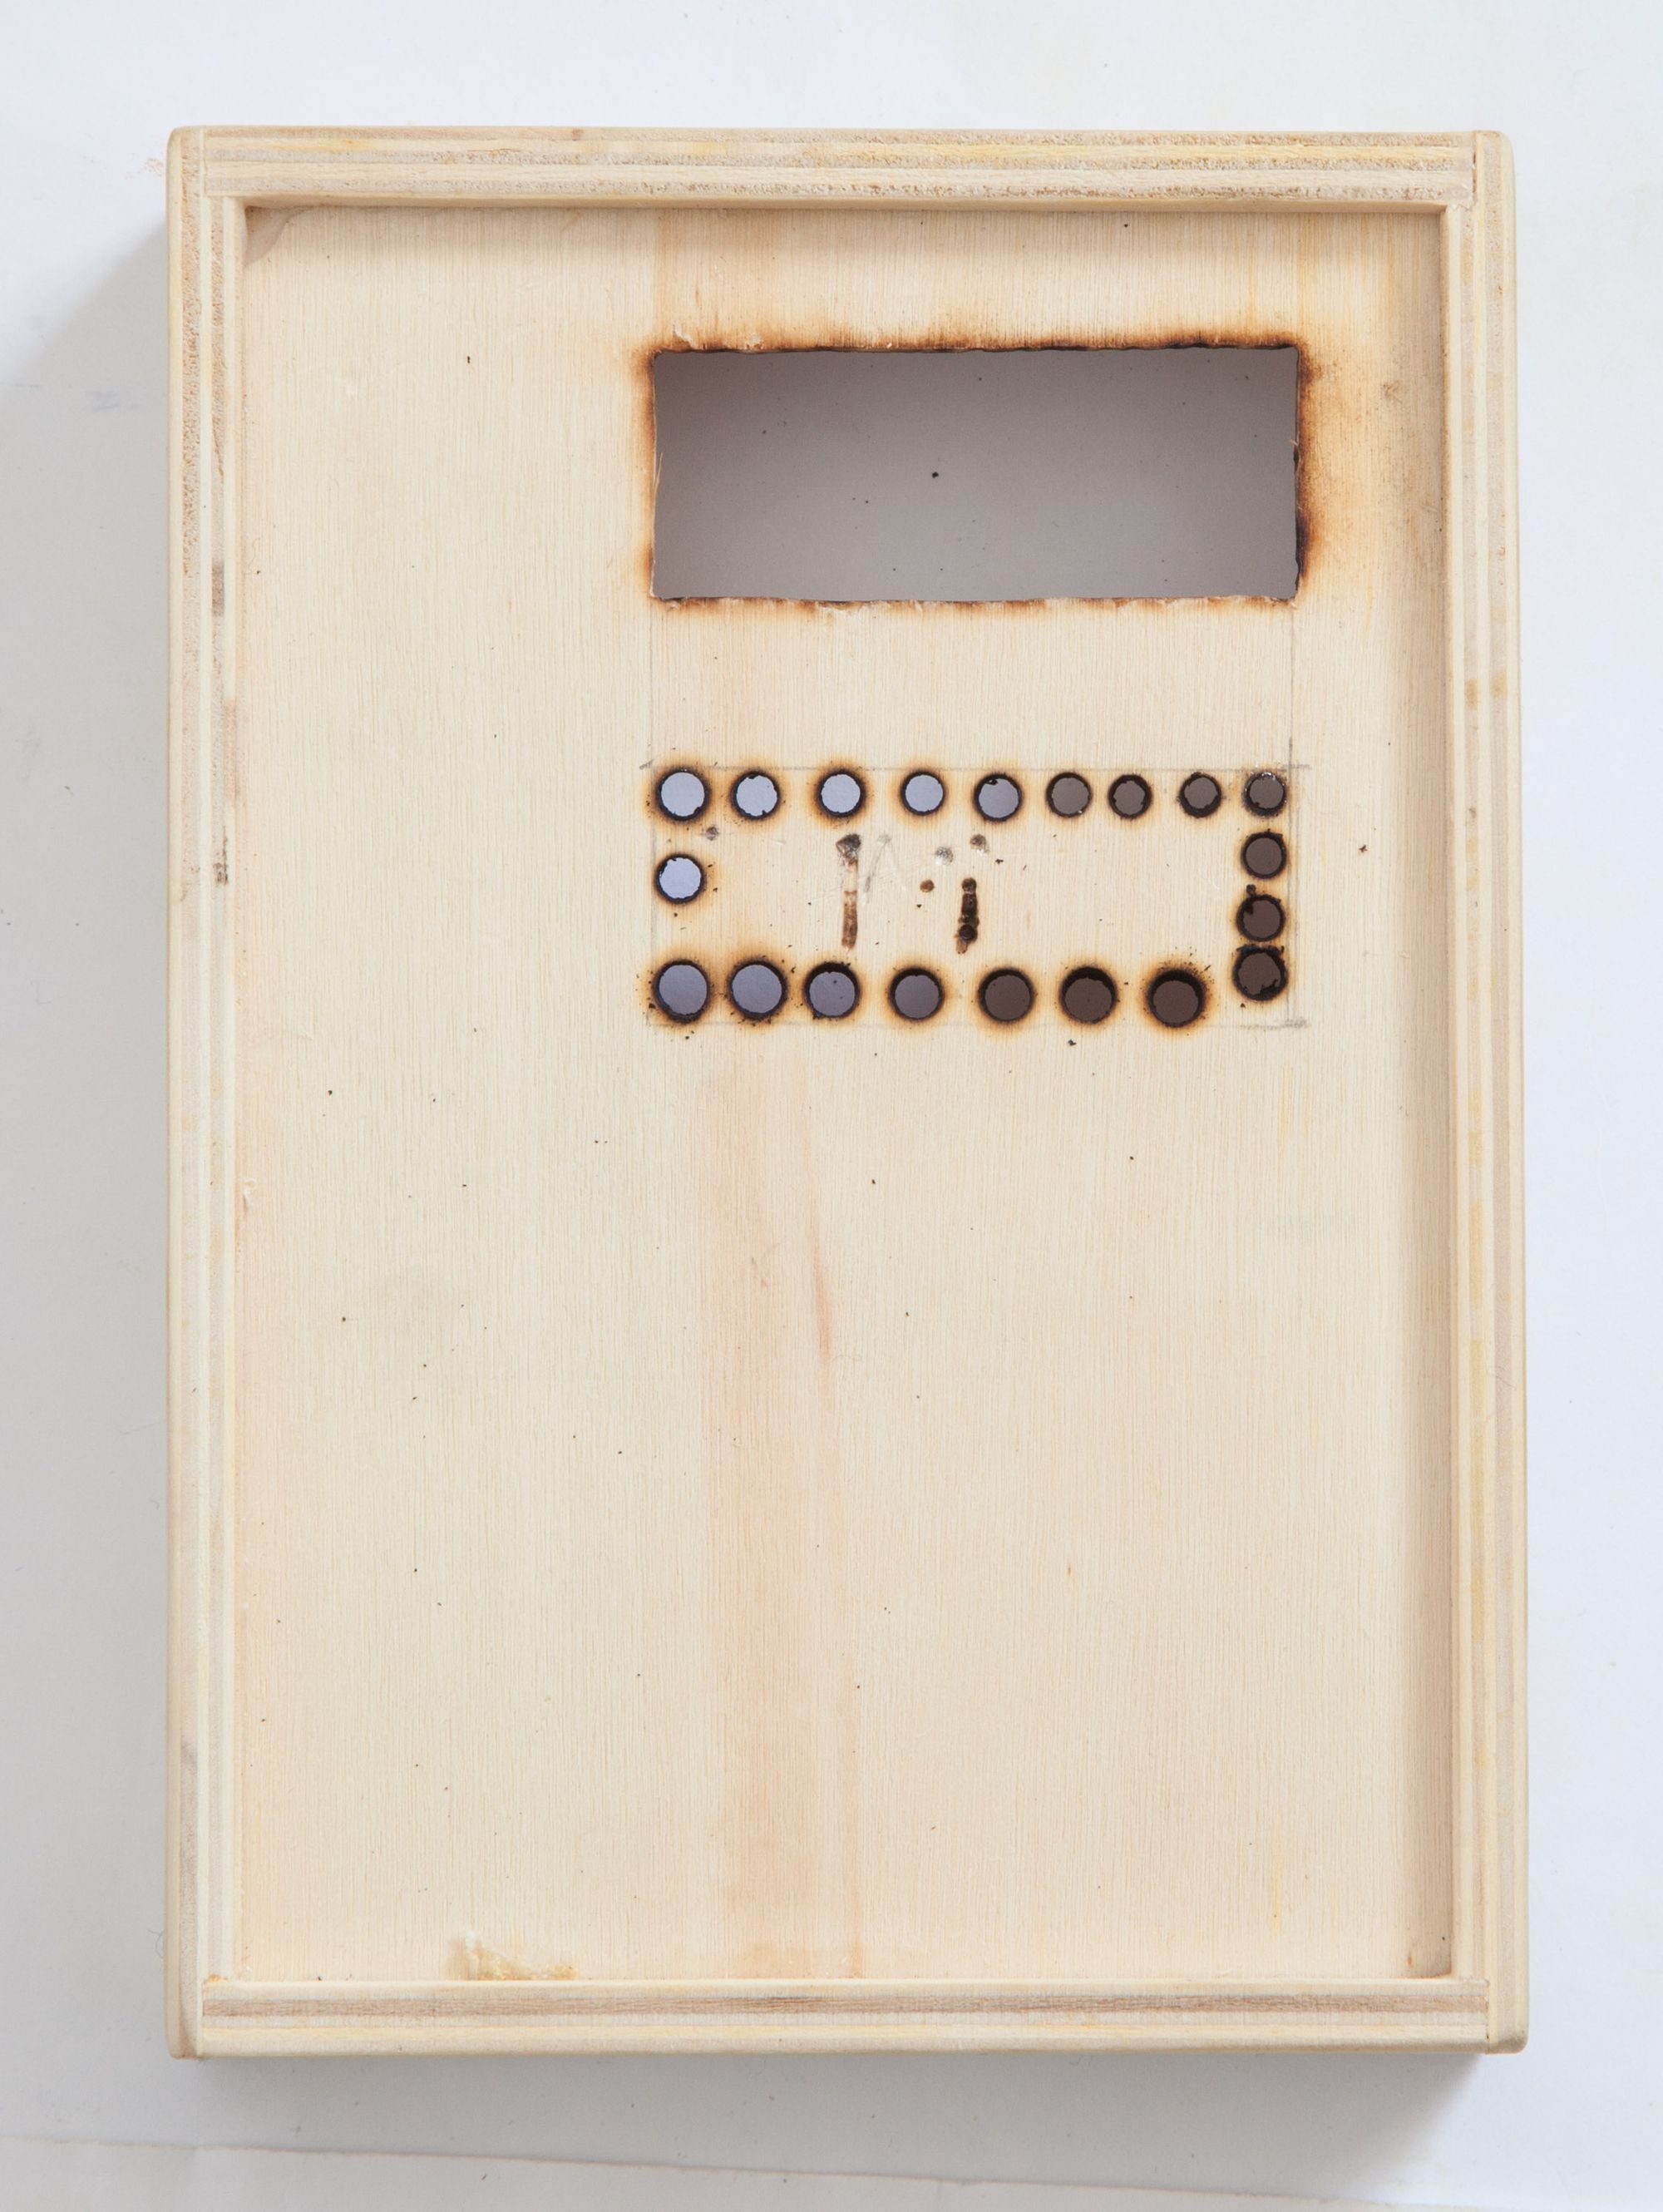
}Now, let's cut a hole in the case. For design consistency, I used the same cutting technique. First, make adjacent holes with the soldering iron, and then smooth the edges.
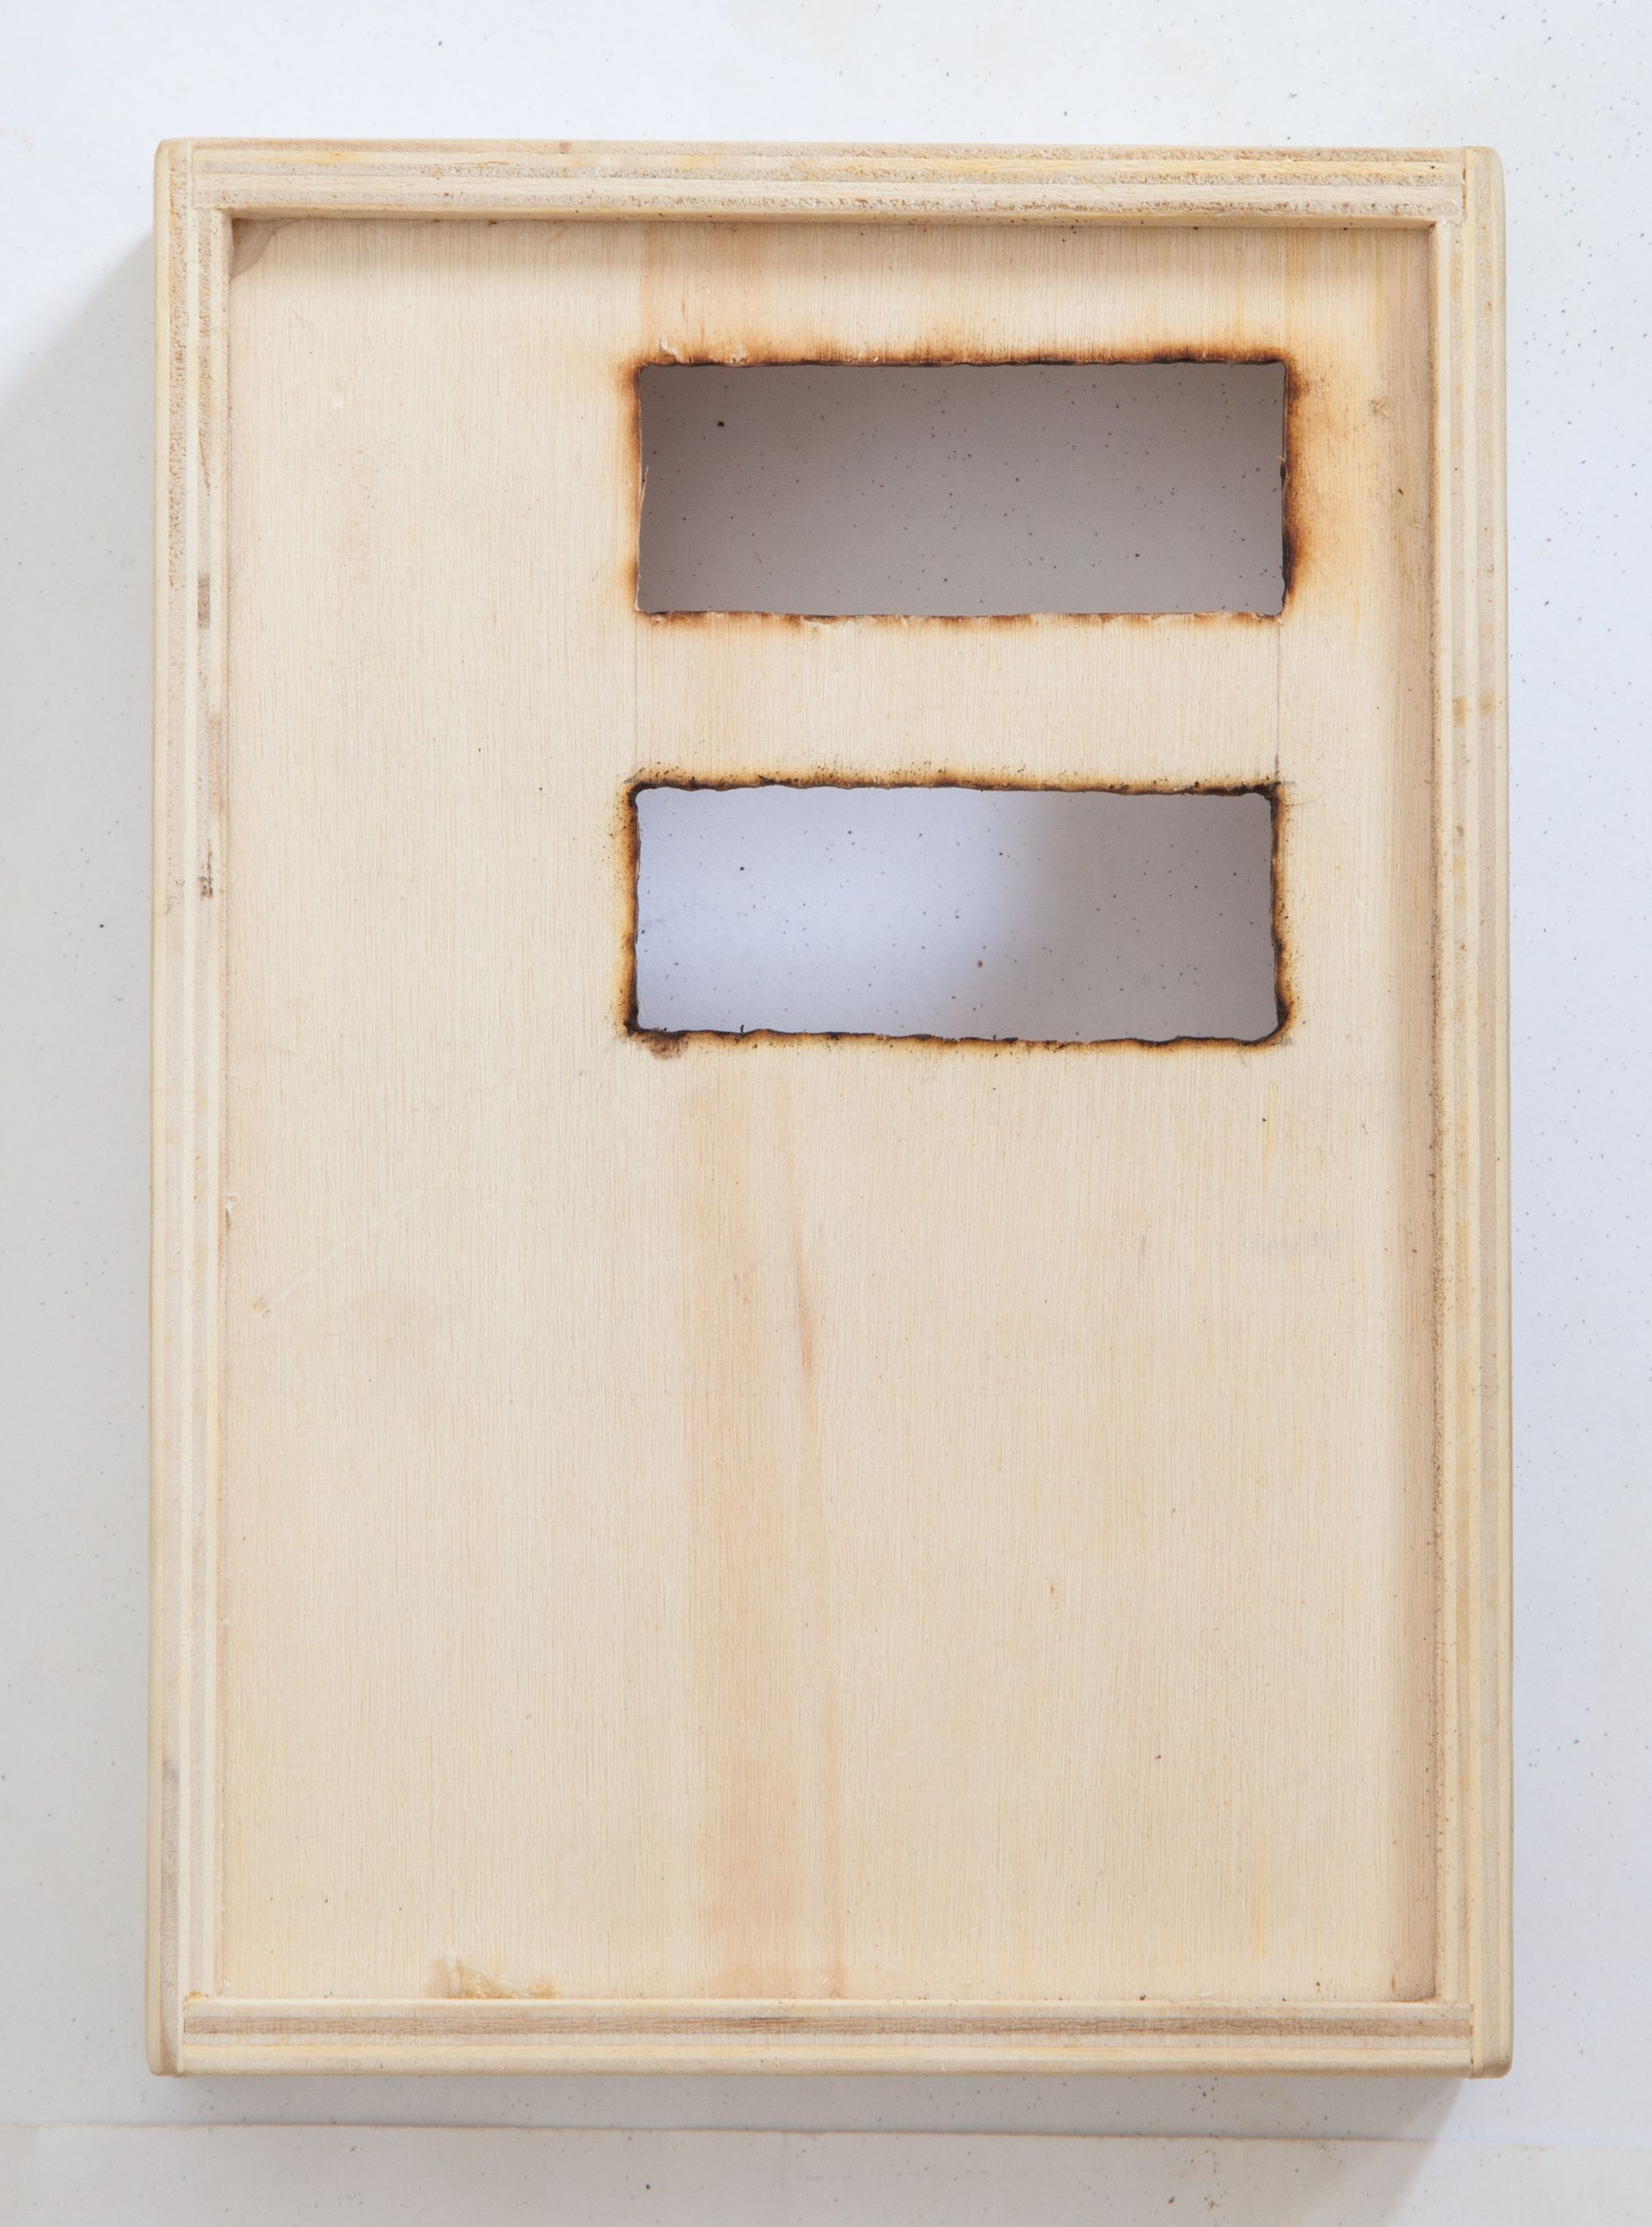
Then, I secured the components in place with a hot glue gun.
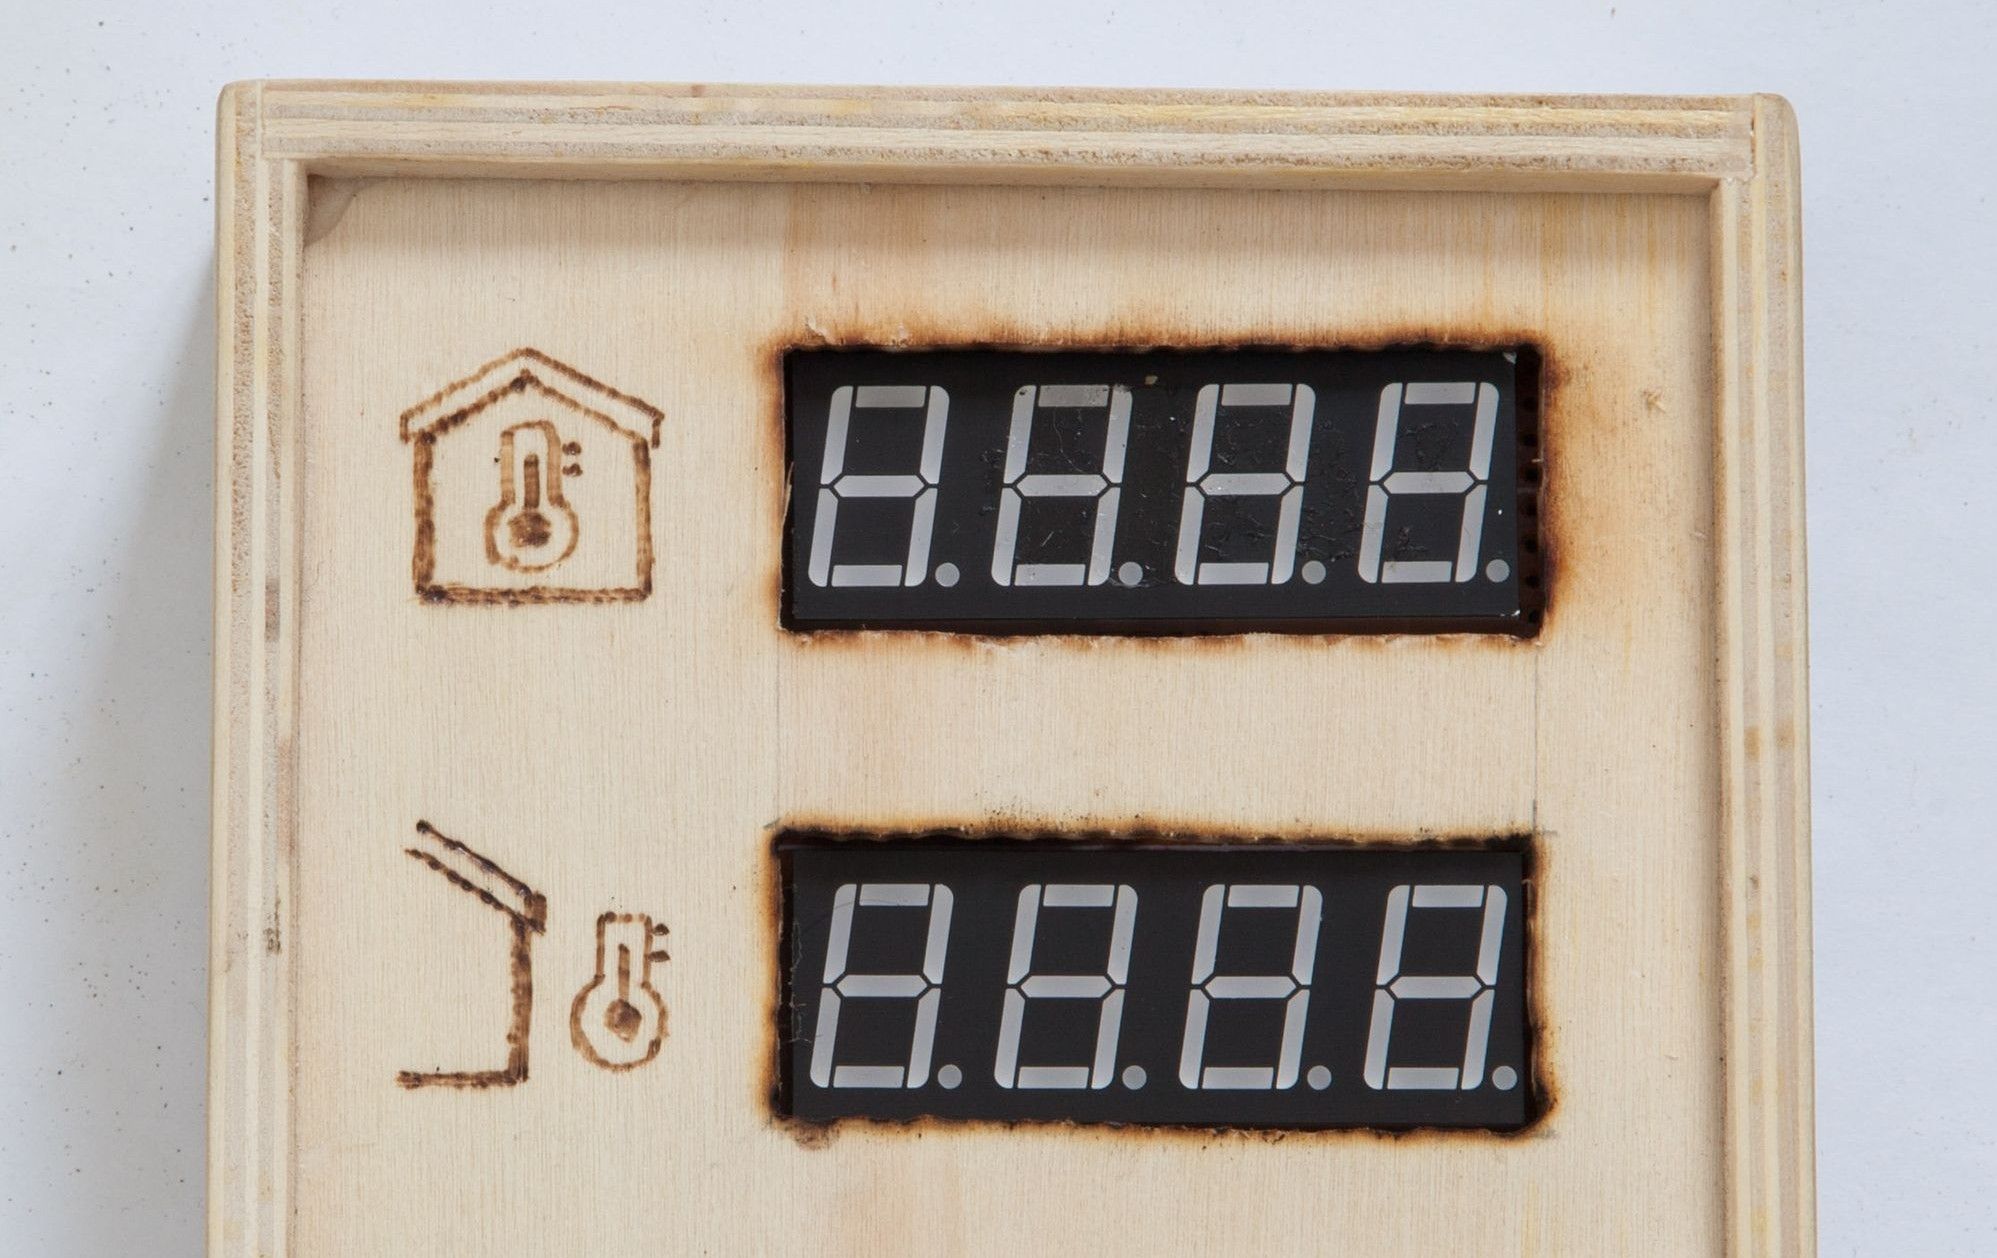
To distinguish the 2 displays, I etched a corresponding icon next to each one. First, I transferred the drawing from the laptop screen on a paper. Next, I used the paper to etch on the wood with my iron solder.
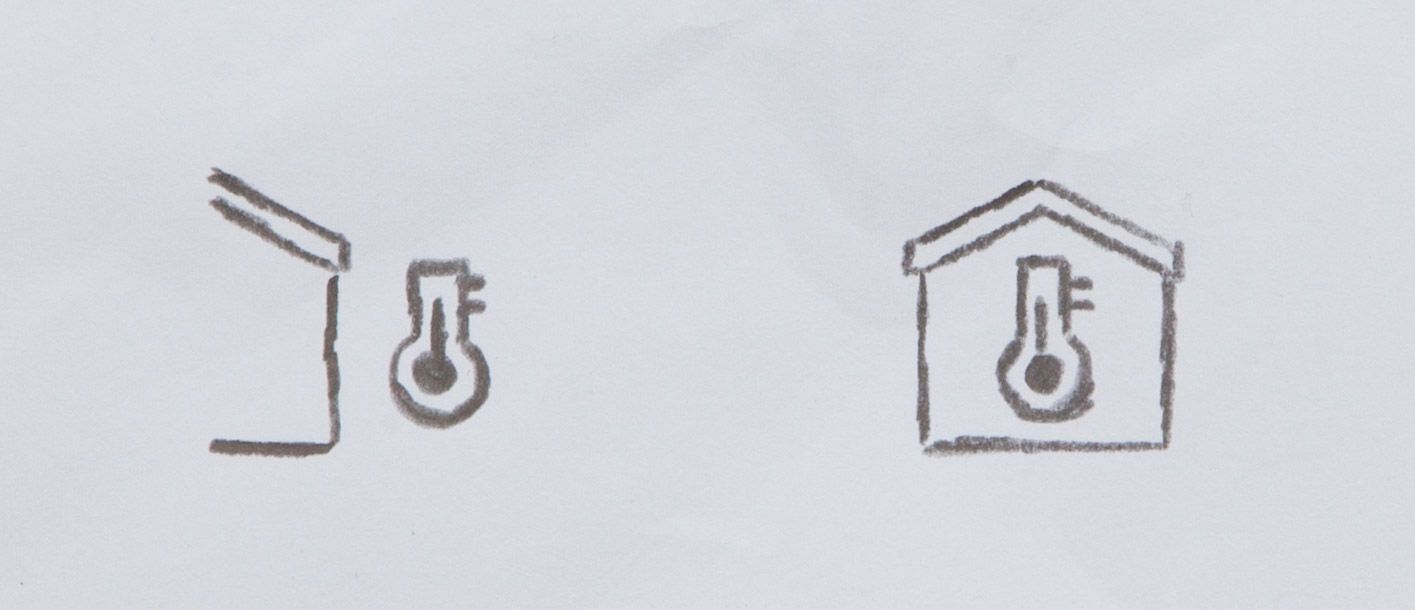
The result is good enough for me.

I present to you the updated weather station, with dual display.

There is still room in the wooden case for future ideas.